Measurements received from Arduino sensors often end up in serial monitors and consoles lost forever as they are not saved anywhere.
What's the point of measuring if we can't look back in history or trigger notifications on the data. Let's take one step further and save this data on our computer first then in the cloud using Amazon Web Services (AWS) (post coming up next week).
You can find the source code of this project here on Github:
- Temperature log, simple
- Temperature log, CSV
- Bit more complex example project from the JavaScript Electronics book, logging data into JSON
Reading a temperature sensor
To get some sensor measurements we will use an Arduino UNO and read the temperature and humidity values from a DHT22 sensor which is one of the more accurate sensors you can buy.
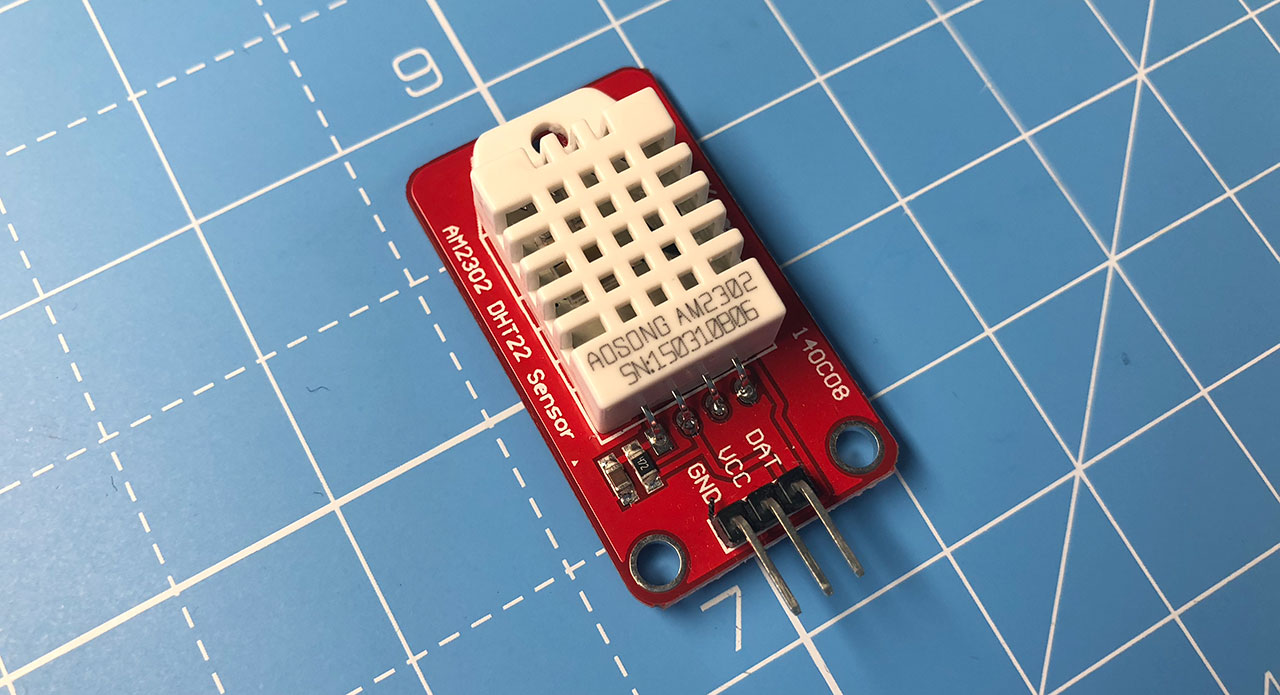
Wiring this sensor up is quite simple: we first connect it to the 5V and GND pins, then the data pin (DAT) to a digital pin of your choice. I picked D12. Check the video out for reference.
To read this sensor we will need to add this piece of Arduino code into the IDE after installing the DHT library. If you need help installing the IDE and uploading code to the Arduino, have a look at my free ebook to get you started.
#include "DHT.h"

// DHT22 DAT pin
#define DHTPIN 12

// Type of DHT sensor
#define DHTTYPE DHT22

DHT dht(DHTPIN, DHTTYPE);

void setup() {
  Serial.begin(9600);
  dht.begin();
}

void loop() {
  delay(2000);
  float h = dht.readHumidity();
  float t = dht.readTemperature();

  String message = "";

  if (isnan(h) || isnan(t)) {
    return;
  }

  message = h + ", " + t;

  // Send message
  Serial.println(message);

}
What we did here first is initialised the DHT library with the necessary settings. If you connected your sensor to a different pin, change #define DHTPIN 12 to a different number. If you use the more common, blue DHT11 sensor, change this line: #define DHTTYPE DHT22 to this #define DHTTYPE DHT11.
In the loop function of the sketch we first save the temperature and humidity readings we retrieved from the DHT library to a variable.
Arduino Serial Write
After a simple error handling and some string concatenation, we are ready to pass the reading through via the USB serial port to the serial monitor.
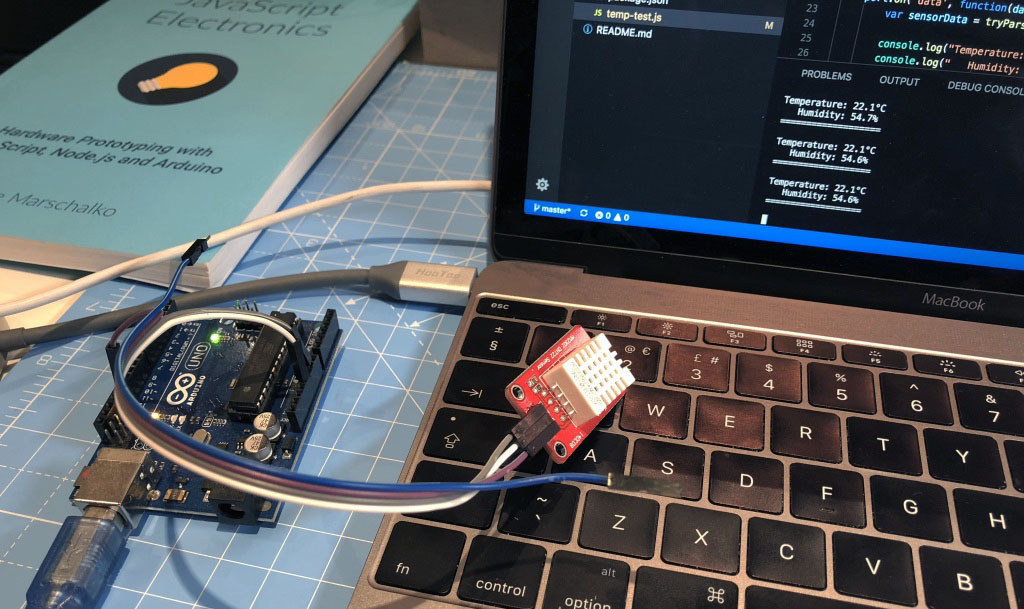
Upload the code onto the Arduino and open up the serial monitor in the Arduino IDE. You should now start seeing sensor readings appearing every other second in the monitor window!
Receiving the message with Node.js
The Serial.println(message) command in the Arduino sketch sends the message to the available serial connection. By default, this is the USB port you connected the Arduino to, but it could be a wireless serial connection via bluetooth as well.
The cool thing about Node.js is that, unlike your JavaScript code running in the browser, you have access to the USB ports and read these incoming messages.
Let's create a new folder and initialise a new Node application with the npm init command in the command line prompt. For this command to work, you will need NPM and Node.js installed on your computer's command line (Terminal on Mac, Command Prompt on Windows).
Once the initialisation has completed, create a new temp-log.js file and add this piece of code to connect to the USB port:
const SerialPort = require('serialport');

// Add your USB port name
const port = new SerialPort('/xyz', {
	parser: SerialPort.parsers.readline('\n')
});

port.on('open', function () {
	console.log('Opened port...');
});
Before testing this code let's first install the serialport library: npm install --save serialport.
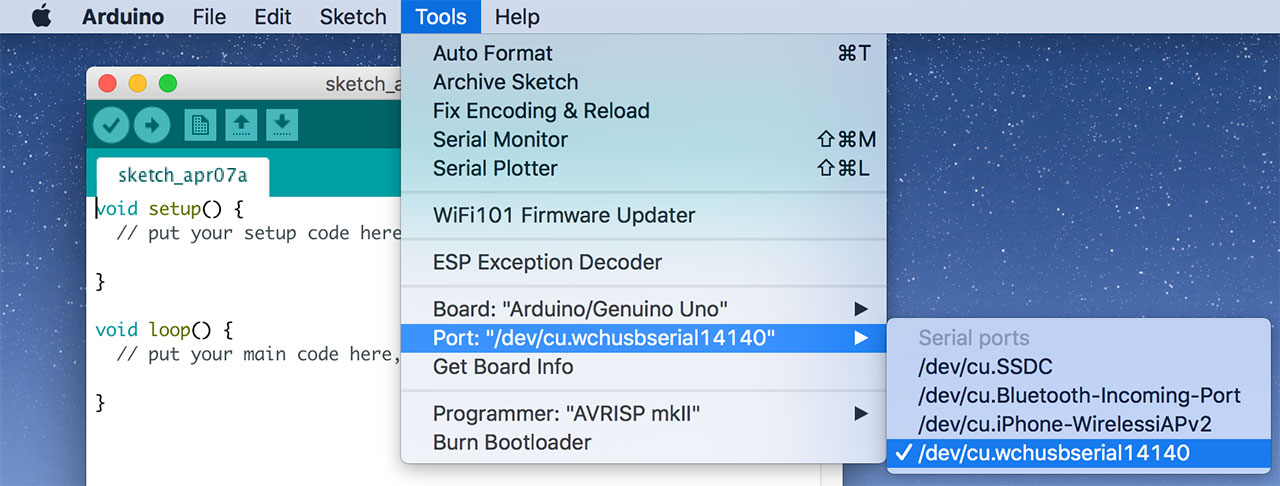
Let's also review what's happening in this javascript file: in the first line we load the serialport library, then initilise the port by passing in some settings, so here make sure you replace "/xyz" with the name of the USB port you connected the Arduino to. You can easily find the name in the Arduino IDE under the port menu:
The final piece of code we added was an event listener that will fire as soon as the connection to the port is established.
To test this save the file, connect your Arduino and run node temp-log.js. You should see the "Opened port..." message appearing after a couple of seconds.
This is great, but we are missing the most important part of the application and that is capturing the incoming messages on the port we are now connected to. Let's extend the original event listener with a new one nested inside:
port.on('open', function () {
	console.log('Opened port...');

	port.on('data', function (data) {
		console.log(data);
	});
});
After saving and re-testing this, the app will read our sensor measurements from the Arduino and output them to the console.
Changing the data type to JSON
At this point we could start manipulating the string to extract the data from the message but it would be much easier if the data was coming through in JSON format already as we could very easily parse that into a javascript object.
To achieve this, we will format the data to JSON in the Arduino sketch. Here's how the loop function changes:
void loop() {
  delay(2000);
  float h = dht.readHumidity();
  float t = dht.readTemperature();

  String message = "";

  if (isnan(h) || isnan(t)) {
    return;
  }

  // Create JSON as a message
  message = message + "{\"humidity\": ";
  message = message + h;
  message = message + ", \"temperature\": ";
  message = message + t;
  message = message + "}";

  // Send message
  Serial.println(message);
}
As you probably noticed, this still is just a string, but since it now contains JSON formatted text, we can use JSON.parse() in Node.js to parse it to an object:
function tryParseJson (str) {
    try {
        JSON.parse(str);
    } catch (e) {
        return false;
    }
    return JSON.parse(str);
}

port.on('open', function () {
	console.log('Opened port...');

	port.on('data', function (data) {
		const sensorData = tryParseJson(data);

        console.log(sensorData.humidity);
        console.log(sensorData.temperature);
	});
});
This is a much better approach and will be much easier to work with! I added the additional tryParseJson() function to wrap the JSON.parse() call into some error handling in case the incoming message is not formatted correctly.
Data logging with timestamp
Finally, let's save this piece of data in CSV format into a new txt file. Using Nodes built in fs (file system) library, this is how you can save something into a file:
fs.appendFile('log.txt', 'hello', function (err) {
    if (err) return console.log(err);
    console.log('Logged the word hello into a new txt file!);
});
In the final version of the Node.js script, I added a timer that only saves the data every 5 minutes. For testing, change this variable to, say, 0.1. In that case you will only have to wait 6 seconds for a new entry to appear.
const SerialPort = require('serialport');

// Add your USB port name
const port = new SerialPort('/dev/xy', {
	parser: SerialPort.parsers.readline('\n')
});

const fs = require('fs');

const logIntervalMinutes = 5;
let lastMoment = new Date();

function tryParseJson (str) {
    try {
        JSON.parse(str);
    } catch (e) {
        return false;
    }
    return JSON.parse(str);
}

console.log('Initialising...');

port.on('open', function () {
	console.log('Opened port...');

	port.on('data', function (data) {
		const sensorData = tryParseJson(data);
		const moment = new Date();

		if (moment.getTime() - lastMoment.getTime() > logIntervalMinutes * 60 * 1000) {
			lastMoment = moment;

			fs.appendFile('log.txt', `\n${sensorData.temperature} , ${sensorData.humidity} , ${moment}`, function (err) {
			    if (err) return console.log(err);
			    console.log('Logged data: ', moment);
			});
		}
	});
});
In the JavaScript Electronics book the Smart Talking Plant example project logs the data in JSON format which allows you to then later read it and parse it back to a JavaScript object. The book explains this is in much greater detail, but more advanced users can browse the source code on Github: https://github.com/webondevices/js-electronics-book/blob/master/11-smart-plant-log-chart/server.js

Next week, we will get started with Amazon Web Services and save this data into DynamoDB, the NoSQL cloud database service of AWS.