I’ve received many emails asking for help setting up the Xbox Kinect sensor to work with JavaScript so I decided to publish a complete guide. This will let anyone with a Microsoft Kinect develop JavaScript applications tracking full body movements and gestures in real-time.
Kinect for Windows
It’s important to note that there are multiple versions of the Kinect sensor and not all of them are recognised by personal computers therefore couldn’t be used for JavaScript development.
XBOX Kinect, first generation:
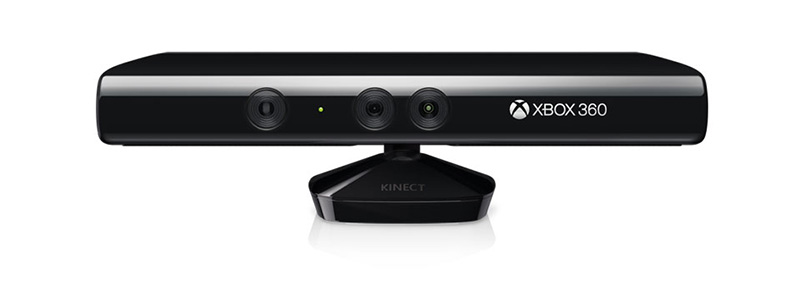
The first generation of the Kinect sensor introduced in 2010 was called Xbox 360 Kinect and was intended to be used with the Xbox 360 gaming console. Later, Microsoft released another version called Kinect for Windows. This sensor looked exactly the same but had improved features for kiosk and application development like Near Mode. The biggest difference is that the Kinect for Windows was licensed for commercial app distribution, and the 360 one is for development work only.
Both of these sensors have a USB connector and are compatible with PCs so can be used for JavaScript development.
Kinect for Windows, second generation:
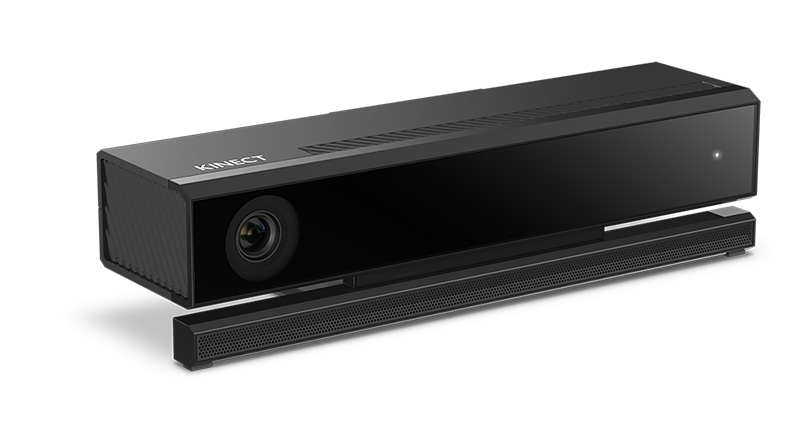
In 2013 a new Kinect sensor was released with the XBOX One console as well as a new Kinect for Windows so both first generation sensors are now outdated. Unfortunately the XBOX One Kinect that comes with the console can no longer be used for development work like you can with the XBOX 360 Kinect.
In case you have a first generation Kinect and you wish to develop JavaScript applications on a Macintosh, try using the Zigfu browser plugin. I tried it with my Xbox 360 Kinect and it worked perfectly! Alternatively, on a Windows machine you can use the official JavaScript SDK.
In this introduction we will be dealing with the new generation of the Kinect for Windows sensor.
Kinect for Windows V2
XBOX and the Kinect are Microsoft products so it’s understandable that they want to restrict development to Windows PCs only. There are a few libraries like Libfreenect2 that, in theory, could enable Macs to work with the Kinect but they are not very reliable. I couldn’t get it working possibly due to this issue.
From my experience after weeks and weeks of researching, testing and talking to at least a dozen developers, it seems that the most reliable way of working with the Kinect cross-platform, and with JavaScript most importantly, is this: Connect the Kinect to a Windows machine running Node.js and the Kinect2 library. This Node.js application on the Windows machine can receive the sensor data with no issues from the official SDK. From there we can publish and stream the data through web sockets to any other machine: Windows, Mac or Linux. So essentially we are only using the Windows machine as a low level server that reads pure data from the Kinect and publishes it for other computers to use and interpret.
For the simple task of streaming data you probably don’t want to maintain a full desktop machine so I was looking at options to go as cheap and small as possible. It would be interesting to see if the new Raspberry PI 2 running Windows 10 IoT could handle this task? Or maybe one of these Stick PCs?
On the other hand you might just want to consider writing the whole application on that Windows machine as you already have the Node.js JavaScript environment set up. I personally don’t want to so we will definitely look into streaming the data over to my Macbook Pro.
Installation
Let’s setup the Windows machine first, the one that is going to receive and handle the sensor data in the Node.js application. The reason why the Kinect 2 Node.js library we are going to use only works on Windows machines is that it relies on the official Kinect 2 SDK that can only be installed to Windows machines. Go ahead, and install it first from this page. You might want to restart your machine after this step. Please also note that in order to install the SDK you will need a 64bit Windows 8 or higher.
Next, you need Node.js installed in the Windows command line. The official Windows Installer can be downloaded from nodejs.org. If the installation was successful entering node -v into the command line will give you the version number of Node installed. You need at least version 0.11.3 for the Kinect 2 module to work. The installation will depend on node-gyp so install that too: npm install -g node-gyp.
If that wasn’t enough, you will need to install Microsoft Visual Studio C++ 2013 for Windows Desktops (Express version works too) and if you have a 64-bit build then the Windows 7 64-bit SDK. Yes, even if you are not on Windows 7.
After that you can type npm install kinect2 and the library will be installed to your machine...
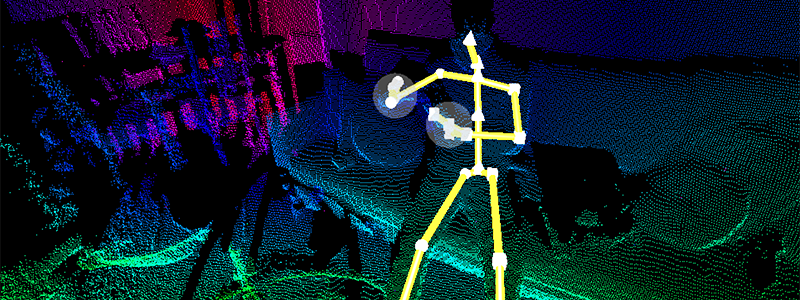
Reading skeleton data
Now that everything is installed, let’s test and extract the skeleton tracking data!
Create a new folder and a new JavaScript file for your Kinect application. Name it output.js for instance. We need to start off this file by loading the Kinect 2 library and initialising it:
var Kinect2 = require('kinect2');

var kinect = new Kinect2();
After that we power up the Kinect with the open() method and test if it returned true in the same line which means that the start up was successful:
if(kinect.open()) {
    console.log("Kinect opened!");
}
Inside this if condition we can now add an asynchronous event listener that waits for the skeleton data to arrive:
kinect.on('bodyFrame', function(bodyFrame){
for(var i = 0; i < bodyFrame.bodies.length; i++) {
if(bodyFrame.bodies[i].tracked) {
console.log(bodyFrame.bodies[i]);
}
}
});
//request body frames
kinect.openBodyReader();
//close the kinect after 1 minute
setTimeout(function(){
kinect.close();
console.log("Kinect Closed");
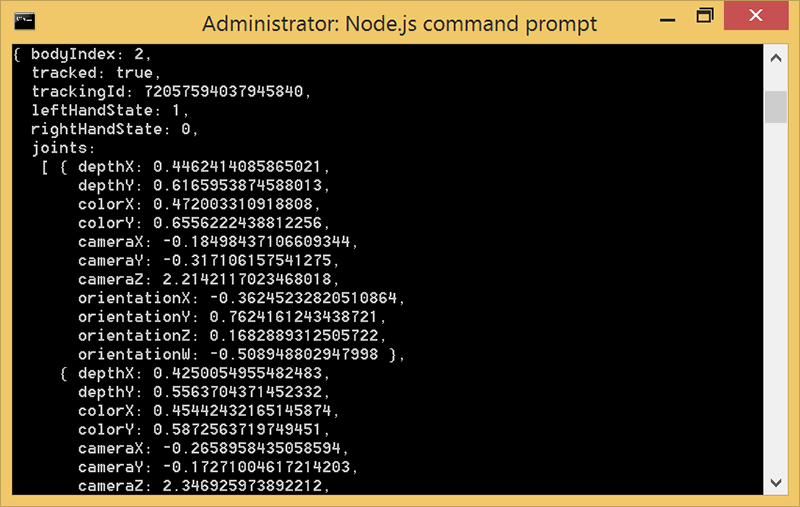
}, 60000);Running this js file from the project folder with node output.js will result in outputting the pure sensor data in a JSON format.
Here's the whole script in one, again:
var Kinect2 = require('kinect2');

var kinect = new Kinect2();

if(kinect.open()) {
    console.log("Kinect Opened");
    //listen for body frames
    kinect.on('bodyFrame', function(bodyFrame){
        for(var i = 0;  i < bodyFrame.bodies.length; i++) {
            if(bodyFrame.bodies[i].tracked) {
                console.log(bodyFrame.bodies[i]);
            }
        }
    });

    //request body frames
    kinect.openBodyReader();

    //close the kinect after 5 seconds
    setTimeout(function(){
        kinect.close();
        console.log("Kinect Closed");
    }, 60000);
}
Now you have the Kinect 2 skeleton data available in Node.js and JavaScript!
Next week I’m going to publish a new post in which we will carry on and:
-
Analyse the skeleton data and see what properties of the body can we extract from it
-
Create a JavaScript web socket server on the Windows machine and stream the skeleton data for browsers running any operating system on any machine
-
Connect to the web socket server from Chrome on a Macintosh and visualise the skeleton data with HTML and CSS
-
Define and interpret gestures from the pure data and create a full screen photo gallery that can be swiped back and forth with arm movements
You can read the second part of this post here: