The Introduction to JavaScript Electronics Ebook is now ready to be downloaded from Web on Devices (see bottom of this page to download). The examples throughout the Free Ebook use an Arduino UNO connected to the USB port of a computer running Node.js and the Johnny-Five JavaScript library. Luckily, it is now possible to run both Node.js and Johnny-Five on any Raspberry PI computer as well.
This means that if you have a Raspberry PI at home you can still get started with JavaScript Electronics and the Free Ebook. This article will show you how to get your PI ready to run JavaScript.
JavaScript and Node.js on the Raspberry PI
JavaScript has always been the scripting language of the Internet running inside browsers. Node.js is built on top of Google’s V8 JavaScript engine which can run independently from the browser and on the server which can be any computer, in our case it will be the Raspberry PI.
If you have a PI that is brand new or haven’t been used for a while you should run some system update tasks first by entering these commands into the command line interface one-by-one:
sudo apt-get update
sudo apt-get upgrade -y
sudo apt-get diet-upgrade -y
sudo dpi-update -y
You might want to prepare a tea while these updates run as they can potentially take an hour in total to finish.
After the preparations it’s time to install NPM, the Node Package Manager and Node itself.
echo "deb http://node-arm.herokuapp.com/ /" | sudo tee --append /etc/apt/sources.list
sudo apt-get update
sudo apt-get install -y --force-yes node libusb-1.0-0-dev
sudo npm install -g npm --unsafe-perm
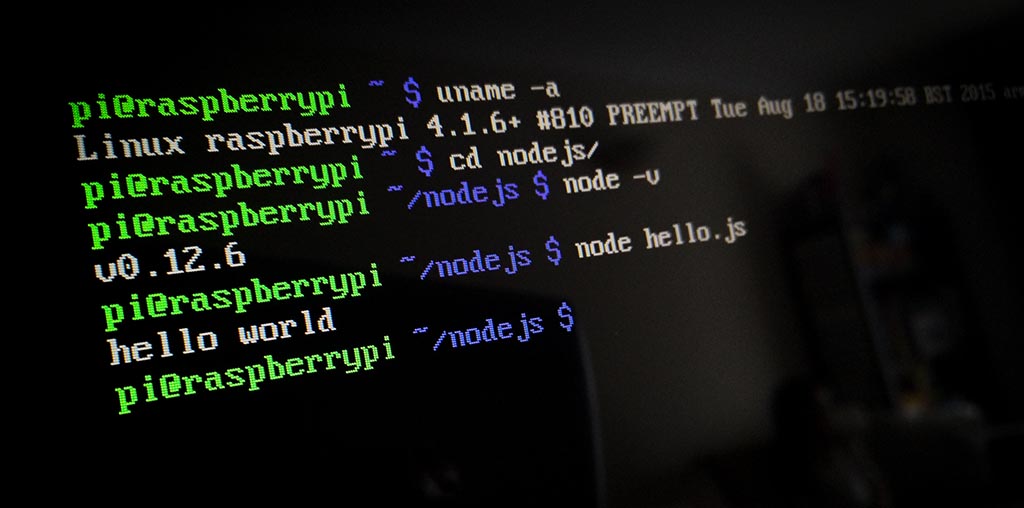
Check the version of Node to see if the installation was successful:
node -v
If this didn’t work try installing Node by following the instructions on the Node ARM website:
wget http://node-arm.herokuapp.com/node_latest_armhf.deb
sudo dpkg -i node_latest_armhf.deb
Node.js should now be installed. Create a new file called hello.js and add your JavaScript code into it. A hello world message is the most appropriate at this stage:
console.log("Hello World");Saving this file and entering node hello.js will result in the Hello World message appearing. This means that Node.js is fully installed.
Installing Johnny-Five and Raspi-IO
We can now run JavaScript on the Raspberry PI so the next step is to install the Johnny-Five library and Raspi-IO to help us access and interact with the GPIO (General Purpose Input and Output) pins of the Raspberry PI. If all this makes no sense or sounds complicated, please download the Free JavaScript Electronics Ebook and read the first few chapters.
For some reason —unsafe-perm has to be added to each command to give root access to them. Thanks for Barry Schiffer for the info and guidance in his blog post.
git clone git://github.com/rwaldron/johnny-five.git
cd johnny-five
sudo npm install --unsafe-perm
sudo npm install serial port --unsafe-perm
wget http://node-arm.herokuapp.com/node_latest_armhf.deb
sudo dpkg -i node_latest_armhf.deb
cd ..
sudo npm install johnny-five --unsafe-perm
cd johnny-five
sudo npm install -g raspi-io —unsafe-perm
Everything should now be installed. If you still have problems installing any of these, please refer to the individual installation pages or send me an email to hello@webondevices.com
Blink an LED
In the 7th chapter of the JavaScript Electronics Ebook we blink an LED light with the Arduino UNO. Moving this circuit over to the Raspberry PI is easy. We have many GND and digital output pins to choose from. I picked number 16 for the LED.
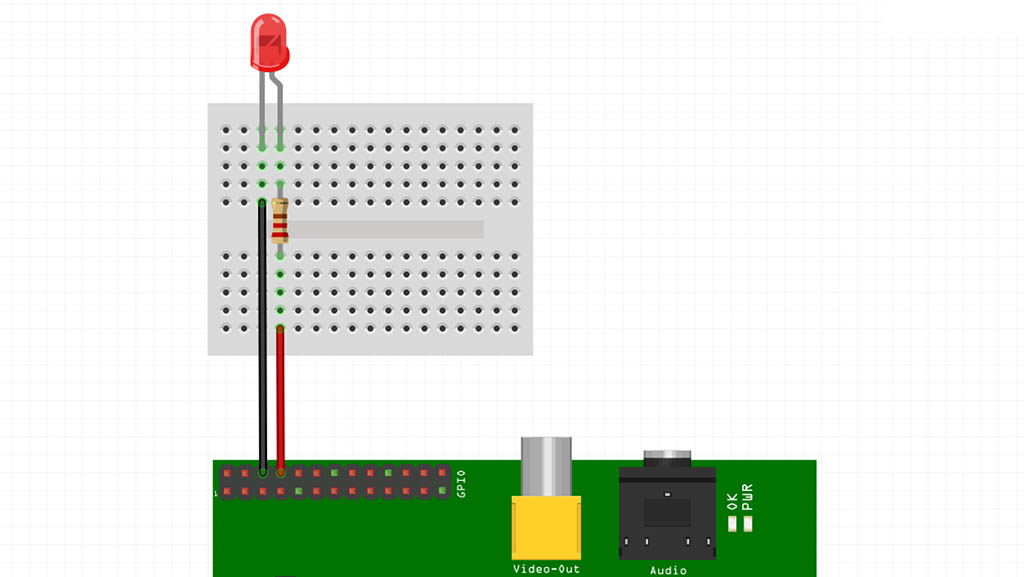
There are actually three different ways these pins are numbered which is really confusing. There’s the peripheral, the wiring and the physical pin numbering. Instead of discussing all these different ways we will simply use the wiring pin numbering:

These pin numbers should be the same on all PI models. According to this the LED is connected to pin 15 so let’s now write the JavaScript code for blinking the LED.
// Blink the LED

var five = require("johnny-five");
var Rasp = require("raspi-io");

var board = new five.Board({
    io: new Rasp()
});

board.on("ready", function() {
    var led = new five.Led(15);
    led.blink();
});
The only difference between this and the Arduino sketch from the Ebook is the addition of the the Raspi IO library and the different pin numbering.
Save this into a file called raspberry.js and run node raspberry.js from the command line.
Working with sensors
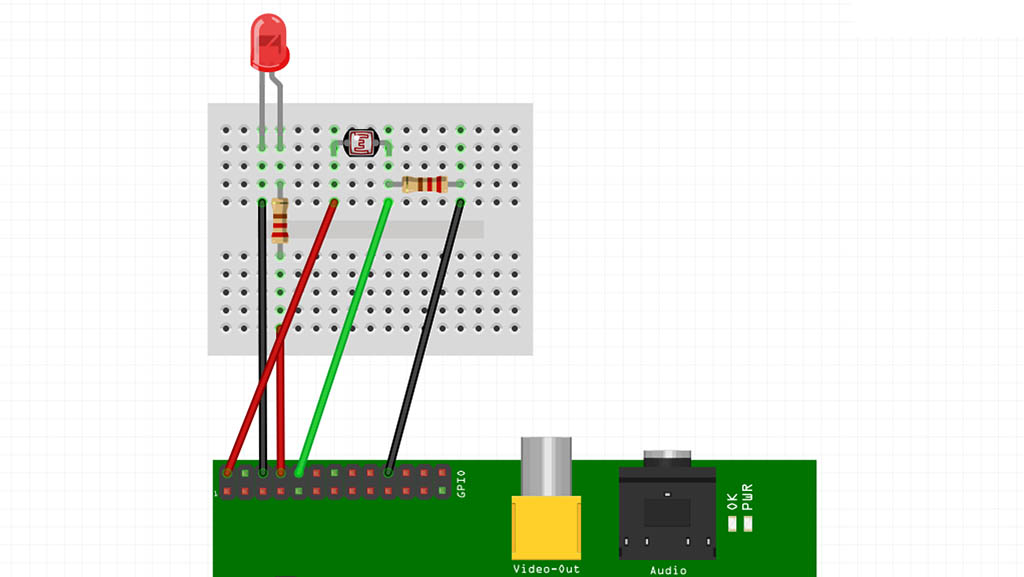
In the Ebook we learned how to use analog light and analog temperature sensor. These examples leverage the Analog to Digital Converter (ADC) of the Arduino UNO. Being “analog” means we can measure values on a whole range and not just digital on/off, bright/dark or hot/cold states. Unfortunately, the Raspberry PI doesn’t have an Analog to Digital Converter which means it can only detect digital states. In case of the light sensor it means that it will return either 1 when there’s enough light or 0 when it’s dark.
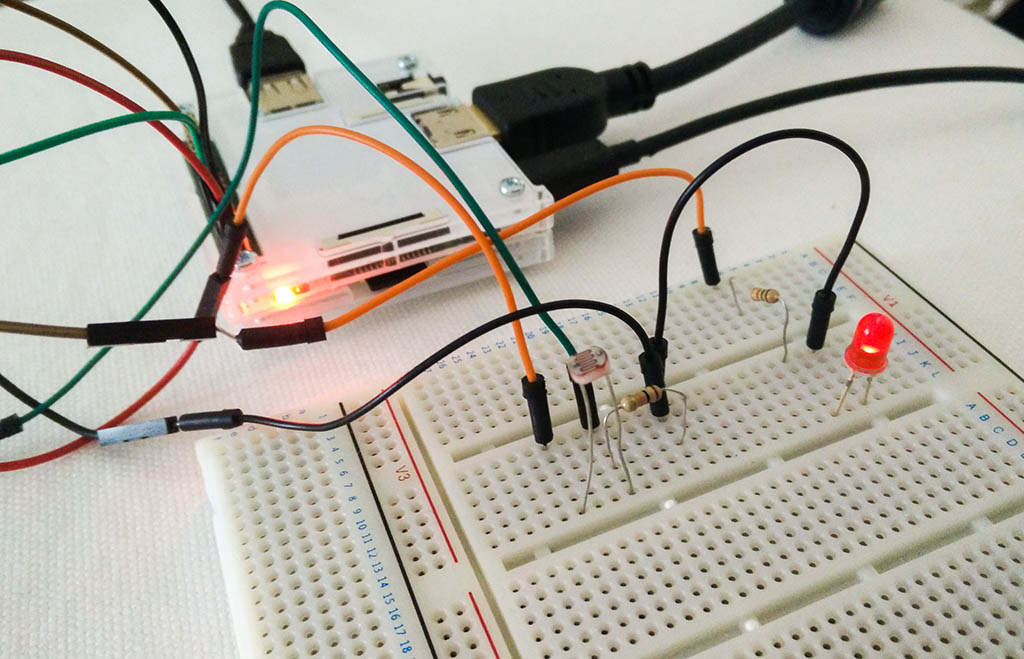
To build the voltage divider, light sensor circuit on the Raspberry PI follow the below image:

In the 7th chapter of the Ebook I explain this circuit in detail. It’s quite important to understand the circuit if you wish to adjust the threshold of the sensor as you will need to change the resistor to do that.
The circuit is complete so it’s time to write the JavaScript code to handle this.
// Read the light sensor

var five = require("johnny-five");
var Rasp = require("raspi-io");

var board = new five.Board({
    io: new Rasp()
});

board.on("ready", function() {
    this.pinMode(16, fivePin.INPUT);

    this.digitalRead(16, function(value){
        console.log(value);
    });
});
In the callback function of the digitalRead method the value variable will return 1 when there’s enough light or 0 when it’s dark.
Let’s combine the two examples and switch the LED on when it’s dark and off when the environment is bright enough.
Here’s the circuit for that on the Raspberry PI:
And here’s the combined source code:
var five = require("johnny-five");
var Rasp = require("raspi-io");

var board = new five.Board({
    io: new Rasp()
});

board.on("ready", function() {
    this.pinMode(16, fivePin.INPUT);
    var led = new five.Led(15);
    led.on();

    this.digitalRead(16, function(value){
        if(value > 0){
            led.off();
        } else {
            led.on();
        }
    });
});
Running this will switch the LED on when it’s dark and off when it’s bright enough. Combine this with an AC relay module and a desk lamp and you have an automatically switching lamp. We could also swap the light sensor with a digital motion sensor to automate the lamp in a different way.
Now that you have installed Node.js on your Raspberry PI you opened up a whole lot of possibilities. You can build home automation systems with JavaScript, setup and run Node.js web servers, connect to browsers through real-time WebSockets, build kiosks and access and install Node libraries from the 100 thousand available on NPM. The Raspberry PI is actually powerful enough to run a Chrome browser so on the same computer you can host the Node.js server that connects to the physical buttons and sensors and the browser that access and displays these in real-time.
Do you already have a project in mind?